These buttery biscuits rise and are flaky; the flour does not impart any of the grittiness that gluten-free flours can often have. It is the actual world, the one we live in, inhabited with grocery shops and internet recipes and food shopping and various methods to get the things you need to make the likes of a gluten-free biscuit. It is occurring!
The only “special” item you need is a gluten-free flour mix that you can get at most stores.
In fact, the procedures to creating these biscuits are so similar to preparing classic buttermilk biscuits, it may come as a bit of a surprise. Sometimes, luckily, you truly don’t have to reinvent the proverbial wheel.
What to Expect with Gluten-Free Biscuits
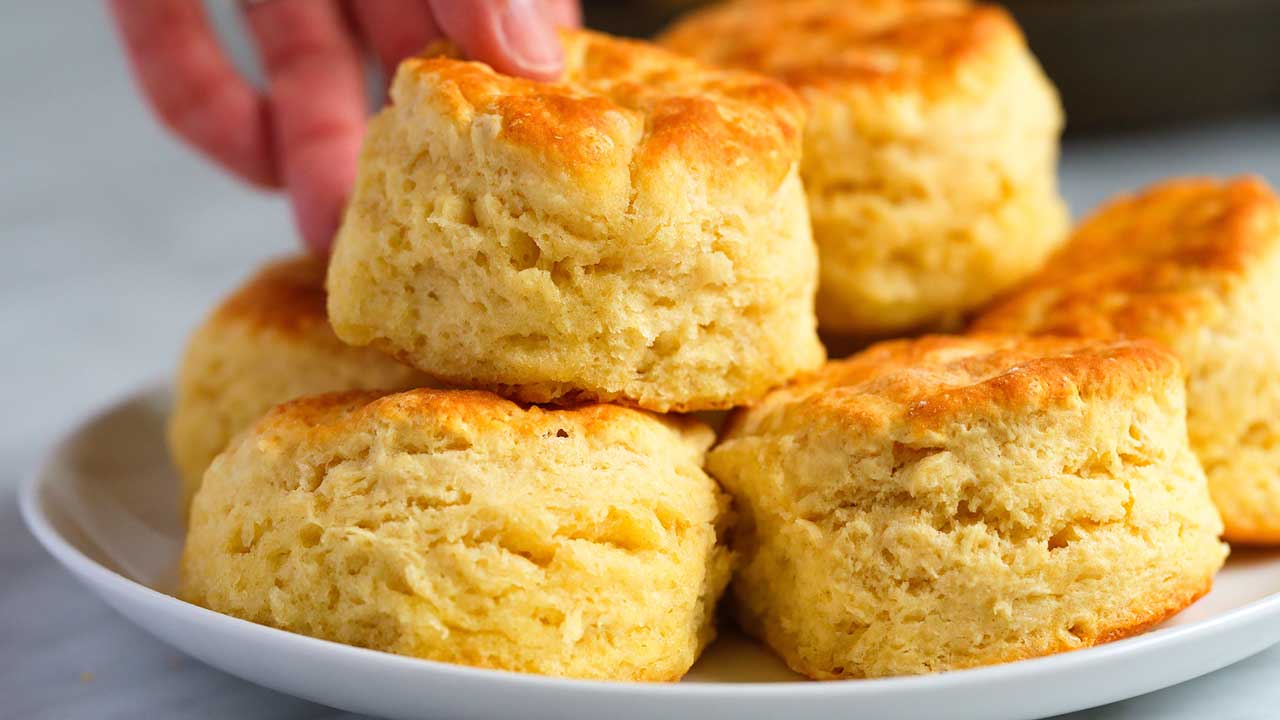
With gluten-free baking, we sometimes have to change our expectations significantly. These biscuits are not going to rise quite as high as a regular biscuit made with all-purpose flour.
But you will have a rise and some flaky layers, promise!
The Best Gluten-Free Flour to Use for Biscuits
So, gluten-free flours are of course a little different than all-purpose flour. They’re frequently more finely crushed, and they absorb fluids and fat differently. They also—and this is the most essential difference—don’t contain gluten, the magic component that helps baked foods hold their structure.
I prefer to use the Bob’s Red Mill 1-to-1 Gluten-Free Baking Blend for this recipe. In fact, this is generally our go-to choice for gluten-free meals on Simply meals. It is trustworthy, and it already includes xanthan gum in it (an ingredient in many gluten-free biscuit recipes that replicates the role of gluten).
King Arthur also manufactures a Measure for Measure Gluten-Free baking blend, and that one works flawlessly with this recipe as well—it already contains xanthan gum in it, so no need to add anything. Their usual gluten-free flour mix also works fine; just make sure you are adding a teaspoon of xanthan gum to this recipe, in with the flour, baking powder, baking soda, sugar, and salt.
Also, I don't suggest Pillsbury’s gluten-free flour for this recipe; the results weren’t as wonderful.
A Word About Buttermilk
Buttermilk is customary for biscuits and it works nicely here, too, and lends a touch of a tang. I start by mixing just a few of teaspoons into the dry ingredients to hydrate and then add the remainder. This helps things blend evenly without producing clumps.
I used a low-fat buttermilk for this recipe, however buttermilk occasionally varies in thickness and you may find yours is thinner or thicker. It can work with any sort of buttermilk, but you may discover that the temperature in the room or the humidity level may suggest that you need a bit more or less. The dough will appear like it has no business coming together—i.e., it may look a touch crumbly—but it will.
If the dough is really and genuinely dry, add extra buttermilk a tablespoon at a time and integrate before adding more. You don’t want a moist dough.
If you don’t have buttermilk, you can always add a squeeze of lemon juice or a dash of apple cider vinegar to the same quantity of milk. It will help acidify the milk; I’d prefer using whole milk if you can.
Read Also: Variations of Gluten Free Buttermilk Biscuits to Try
Tips for the Best Gluten-Free Biscuits Ever
Unsurprisingly, the processes and tactics that produce a wonderful conventional biscuit are vital for baking gluten-free biscuits, too—perhaps even more so!
Treat the biscuit dough like pie crust. Make sure the butter is very cold, and your hands as well. I prefer to chop the butter up into tablespoons, and then halve them and put them in the freezer for 10-15 minutes if my kitchen is warm.
Fold the dough: Turn and fold the dough over and over to form flaky layers. (The fancy name is laminating and it’s also how you create croissants!)
Press straight down and up with the biscuit cutter. This insures that the biscuits will rise as much as possible.
Bake the gluten-free biscuits in a 9-inch cast iron pan or 8x8 glass baking dish. Nestled next to each other, they will blow up rather than expand laterally.
Hands vs. rolling pin: I normally use both for these biscuits. I prefer to be able to feel the dough before I roll it out. I typically use my hands to clean up the dough into the correct form, and then roll it out to bring it to the right thickness.
Let them cool! If you don't wait approximately 10 minutes for these biscuits to cool after they come out of the oven, they may taste a touch gummy.
How to Serve These Biscuits
Okay, that’s a funny notion, isn’t it? You just eat them!
Wait till they cool, so you don’t burn your mouth! Then, split them open and top them with butter, jam, as is, whatever. I also prefer them sprinkled with honey.
Use them as a shortcake alternative in a berry shortcake recipe using strawberries, blackberries, or blueberries.
You could also fairly simply remove the sugar and put them to use in a savory application, such as biscuits and gravy, or add a half teaspoon each of dried herbs such as rosemary, thyme, chives, or parsley.
To Freeze or Not to Freeze?
Sadly, these biscuits don’t take nicely to being cooked from the frozen state. However, you can absolutely bake them, freeze any excess, and defrost at room temperature or throw them directly into a low oven (my choice; try 350°F for 10 to 15 minutes).
They won’t be as soft as they were when they just came out of the oven, but for something you pop out of the freezer and into the oven, they’re pretty dang excellent.
 Mercado Wolski
These buttery biscuits rise and are flaky; the flour does not impart any of the grittiness that gluten-free flours can often have. It is the actual world, the one we live in, inhabited with grocery shops and internet recipes and food shopping and various methods to get the things you need to make the likes of a gluten-free biscuit. It is occurring!
The only “special” item you need is a gluten-free flour mix that you can get at most stores.
In fact, the procedures to creating these biscuits are so similar to preparing classic buttermilk biscuits, it may come as a bit of a surprise. Sometimes, luckily, you truly don’t have to reinvent the proverbial wheel.
What to Expect with Gluten-Free Biscuits
With gluten-free baking, we sometimes have to change our expectations significantly. These biscuits are not going to rise quite as high as a regular biscuit made with all-purpose flour.
But you will have a rise and some flaky layers, promise!
The Best Gluten-Free Flour to Use for Biscuits
So, gluten-free flours are of course a little different than all-purpose flour. They’re frequently more finely crushed, and they absorb fluids and fat differently. They also—and this is the most essential difference—don’t contain gluten, the magic component that helps baked foods hold their structure.
I prefer to use the Bob’s Red Mill 1-to-1 Gluten-Free Baking Blend for this recipe. In fact, this is generally our go-to choice for gluten-free meals on Simply meals. It is trustworthy, and it already includes xanthan gum in it (an ingredient in many gluten-free biscuit recipes that replicates the role of gluten).
King Arthur also manufactures a Measure for Measure Gluten-Free baking blend, and that one works flawlessly with this recipe as well—it already contains xanthan gum in it, so no need to add anything. Their usual gluten-free flour mix also works fine; just make sure you are adding a teaspoon of xanthan gum to this recipe, in with the flour, baking powder, baking soda, sugar, and salt.
Also, I don't suggest Pillsbury’s gluten-free flour for this recipe; the results weren’t as wonderful.
A Word About Buttermilk
Buttermilk is customary for biscuits and it works nicely here, too, and lends a touch of a tang. I start by mixing just a few of teaspoons into the dry ingredients to hydrate and then add the remainder. This helps things blend evenly without producing clumps.
I used a low-fat buttermilk for this recipe, however buttermilk occasionally varies in thickness and you may find yours is thinner or thicker. It can work with any sort of buttermilk, but you may discover that the temperature in the room or the humidity level may suggest that you need a bit more or less. The dough will appear like it has no business coming together—i.e., it may look a touch crumbly—but it will.
If the dough is really and genuinely dry, add extra buttermilk a tablespoon at a time and integrate before adding more. You don’t want a moist dough.
If you don’t have buttermilk, you can always add a squeeze of lemon juice or a dash of apple cider vinegar to the same quantity of milk. It will help acidify the milk; I’d prefer using whole milk if you can.
Read Also: Variations of Gluten Free Buttermilk Biscuits to Try
Tips for the Best Gluten-Free Biscuits Ever
Unsurprisingly, the processes and tactics that produce a wonderful conventional biscuit are vital for baking gluten-free biscuits, too—perhaps even more so!
Treat the biscuit dough like pie crust. Make sure the butter is very cold, and your hands as well. I prefer to chop the butter up into tablespoons, and then halve them and put them in the freezer for 10-15 minutes if my kitchen is warm.
Fold the dough: Turn and fold the dough over and over to form flaky layers. (The fancy name is laminating and it’s also how you create croissants!)
Press straight down and up with the biscuit cutter. This insures that the biscuits will rise as much as possible.
Bake the gluten-free biscuits in a 9-inch cast iron pan or 8x8 glass baking dish. Nestled next to each other, they will blow up rather than expand laterally.
Hands vs. rolling pin: I normally use both for these biscuits. I prefer to be able to feel the dough before I roll it out. I typically use my hands to clean up the dough into the correct form, and then roll it out to bring it to the right thickness.
Let them cool! If you don't wait approximately 10 minutes for these biscuits to cool after they come out of the oven, they may taste a touch gummy.
How to Serve These Biscuits
Okay, that’s a funny notion, isn’t it? You just eat them!
Wait till they cool, so you don’t burn your mouth! Then, split them open and top them with butter, jam, as is, whatever. I also prefer them sprinkled with honey.
Use them as a shortcake alternative in a berry shortcake recipe using strawberries, blackberries, or blueberries.
You could also fairly simply remove the sugar and put them to use in a savory application, such as biscuits and gravy, or add a half teaspoon each of dried herbs such as rosemary, thyme, chives, or parsley.
To Freeze or Not to Freeze?
Sadly, these biscuits don’t take nicely to being cooked from the frozen state. However, you can absolutely bake them, freeze any excess, and defrost at room temperature or throw them directly into a low oven (my choice; try 350°F for 10 to 15 minutes).
They won’t be as soft as they were when they just came out of the oven, but for something you pop out of the freezer and into the oven, they’re pretty dang excellent.