Whether you're upgrading your tone, fixing a damaged neck, or experimenting with customization, replacing the neck on your Yamaha 4-string bass guitar can be a rewarding DIY project.
While it may seem intimidating at first, with the right tools and a bit of patience, you can get it done at home without visiting a luthier. In this step-by-step guide, we’ll walk you through everything you need to know to replace your Yamaha bass neck from preparation to final adjustments.
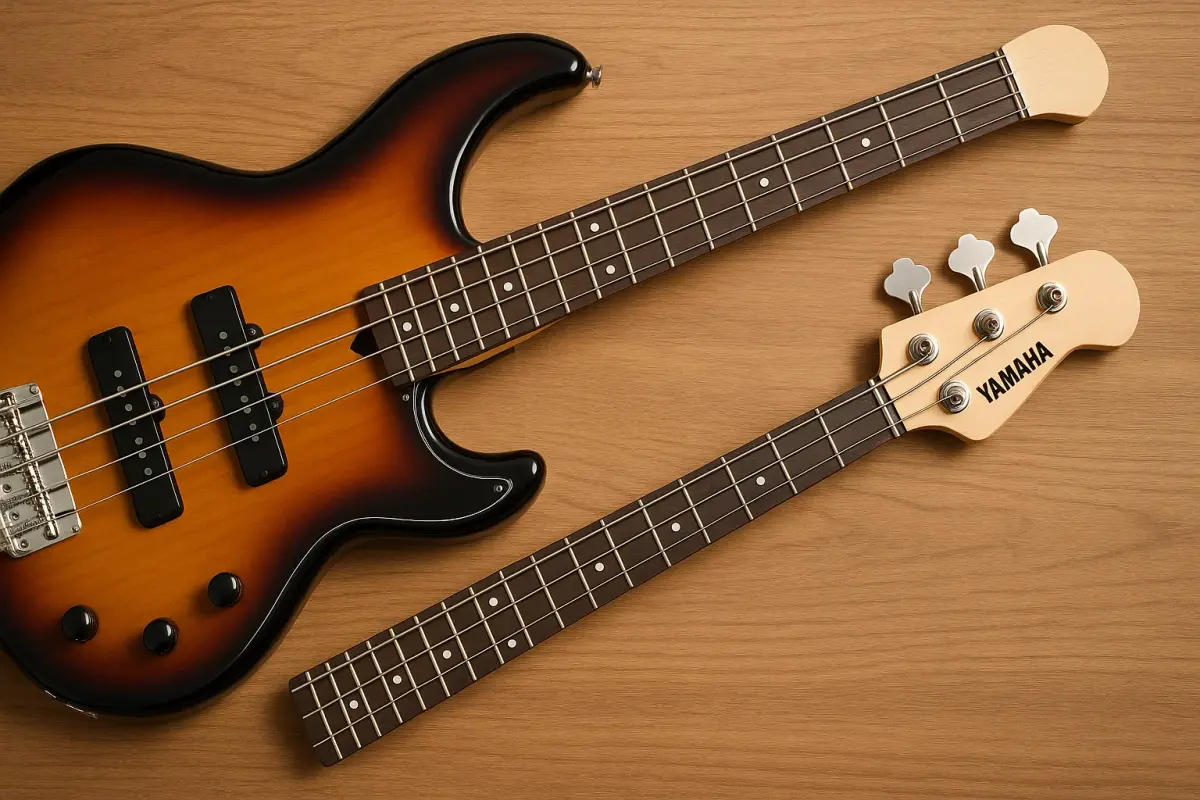
How to Replace the Neck on Your Yamaha 4-String Bass Guitar?

Tools and Materials You’ll Need
Before starting, make sure you have the following tools and components:
Replacement neck (compatible with your Yamaha model)
Screwdriver (Phillips or flat-head depending on your bass)
Allen wrench (for truss rod and saddle adjustments)
String winder (optional, for faster string removal)
Guitar tuner
Ruler or action gauge
Clean cloth and workspace
Masking tape (optional for neck alignment)
Note on Compatibility
Yamaha bass guitars, like the BB, RBX, or TRBX series, may have specific neck pocket sizes and screw patterns. Always check that your replacement neck is compatible in terms of scale length, bolt-on pattern, and neck pocket dimensions.
Step 1: Remove the Strings
Loosen and remove the bass strings using a string winder or by hand. This reduces tension on the neck and gives you full access to the neck joint.
Tip: Label and store your strings carefully if you plan to reuse them, although new strings are recommended after a neck swap.
Step 2: Unscrew and Remove the Old Neck
Flip your bass over to access the back plate or neck screws. Most Yamaha 4-string basses use a bolt-on neck design.
Use the screwdriver to remove the screws (usually 4).
Gently lift the neck out of the body pocket.
Caution: If the neck feels stuck, wiggle it slightly — don’t force it. Some necks are snugly fitted but should come out with gentle pressure.
Step 3: Inspect the Neck Pocket and Screws
Clean out any dust or debris from the neck pocket. Inspect the screw holes for stripping or wear. If needed, fill worn holes with wood glue and toothpicks for a tighter grip.
Step 4: Fit the New Neck
Slide the replacement neck into the body pocket. Check for proper alignment and fit.
The neck should sit flush without wobbling.
Check for gaps between the neck and pocket edges.
Optional: Use masking tape on the body and neck to mark alignment lines before screwing in place.
Step 5: Bolt On the New Neck
Once aligned, insert the screws into their holes and tighten them evenly and gradually.
Avoid overtightening, which can strip the wood or misalign the neck.
Tighten in a crisscross pattern for even pressure.
Step 6: Restring the Bass
Install a new set of strings (or reuse the old ones if they're in good condition). Tune the bass to standard pitch (E-A-D-G) and let the neck settle for a few minutes.
Related Article: What Is The Best Budget Friendly Acoustic Guitar?
Step 7: Make Truss Rod and Action Adjustments
With the strings on and tuned, check your neck relief and string action:
Use the Allen wrench to adjust the truss rod (usually accessible at the headstock or body end of the neck).
Adjust bridge saddles to set your desired string height.
Tip: Aim for low action with no buzzing, but comfort is key.
Step 8: Check Intonation and Tuning Stability
Once the action is set, check and adjust the intonation using a tuner:
Play each string at the 12th fret and compare it to the open string.
Adjust the saddles forward or backward until the pitch matches.
Final Check
Test play your bass across the fretboard. Ensure that:
There are no dead frets or high spots.
The neck feels stable and comfortable.
Tuning holds consistently.
If needed, give the bass a day or two to settle and fine-tune the adjustments.
Bonus: Should You Do This Yourself?
If you’re comfortable with basic tools and guitar maintenance, replacing your Yamaha 4-string bass neck is absolutely doable. However, if your bass has sentimental or high-end value, consider consulting a luthier for professional installation.
Conclusion
Swapping out the neck of your Yamaha 4-string bass guitar can breathe new life into your instrument, improve playability, and even change your tone. By following these steps, you can confidently replace your bass neck at home and enjoy the rewarding feeling of customizing your own gear. Have you replaced a bass neck before? Got a Yamaha BB or TRBX story to share? Drop your experience in the comments!
Read Also : How might AI transform healthcare in the next 10 years?
 Kari Pettersen
Whether you're upgrading your tone, fixing a damaged neck, or experimenting with customization, replacing the neck on your Yamaha 4-string bass guitar can be a rewarding DIY project.
While it may seem intimidating at first, with the right tools and a bit of patience, you can get it done at home without visiting a luthier. In this step-by-step guide, we’ll walk you through everything you need to know to replace your Yamaha bass neck from preparation to final adjustments.
How to Replace the Neck on Your Yamaha 4-String Bass Guitar?
Tools and Materials You’ll Need
Before starting, make sure you have the following tools and components:
Replacement neck (compatible with your Yamaha model)
Screwdriver (Phillips or flat-head depending on your bass)
Allen wrench (for truss rod and saddle adjustments)
String winder (optional, for faster string removal)
Guitar tuner
Ruler or action gauge
Clean cloth and workspace
Masking tape (optional for neck alignment)
Note on Compatibility
Yamaha bass guitars, like the BB, RBX, or TRBX series, may have specific neck pocket sizes and screw patterns. Always check that your replacement neck is compatible in terms of scale length, bolt-on pattern, and neck pocket dimensions.
Step 1: Remove the Strings
Loosen and remove the bass strings using a string winder or by hand. This reduces tension on the neck and gives you full access to the neck joint.
Tip: Label and store your strings carefully if you plan to reuse them, although new strings are recommended after a neck swap.
Step 2: Unscrew and Remove the Old Neck
Flip your bass over to access the back plate or neck screws. Most Yamaha 4-string basses use a bolt-on neck design.
Use the screwdriver to remove the screws (usually 4).
Gently lift the neck out of the body pocket.
Caution: If the neck feels stuck, wiggle it slightly — don’t force it. Some necks are snugly fitted but should come out with gentle pressure.
Step 3: Inspect the Neck Pocket and Screws
Clean out any dust or debris from the neck pocket. Inspect the screw holes for stripping or wear. If needed, fill worn holes with wood glue and toothpicks for a tighter grip.
Step 4: Fit the New Neck
Slide the replacement neck into the body pocket. Check for proper alignment and fit.
The neck should sit flush without wobbling.
Check for gaps between the neck and pocket edges.
Optional: Use masking tape on the body and neck to mark alignment lines before screwing in place.
Step 5: Bolt On the New Neck
Once aligned, insert the screws into their holes and tighten them evenly and gradually.
Avoid overtightening, which can strip the wood or misalign the neck.
Tighten in a crisscross pattern for even pressure.
Step 6: Restring the Bass
Install a new set of strings (or reuse the old ones if they're in good condition). Tune the bass to standard pitch (E-A-D-G) and let the neck settle for a few minutes.
Related Article: What Is The Best Budget Friendly Acoustic Guitar?
Step 7: Make Truss Rod and Action Adjustments
With the strings on and tuned, check your neck relief and string action:
Use the Allen wrench to adjust the truss rod (usually accessible at the headstock or body end of the neck).
Adjust bridge saddles to set your desired string height.
Tip: Aim for low action with no buzzing, but comfort is key.
Step 8: Check Intonation and Tuning Stability
Once the action is set, check and adjust the intonation using a tuner:
Play each string at the 12th fret and compare it to the open string.
Adjust the saddles forward or backward until the pitch matches.
Final Check
Test play your bass across the fretboard. Ensure that:
There are no dead frets or high spots.
The neck feels stable and comfortable.
Tuning holds consistently.
If needed, give the bass a day or two to settle and fine-tune the adjustments.
Bonus: Should You Do This Yourself?
If you’re comfortable with basic tools and guitar maintenance, replacing your Yamaha 4-string bass neck is absolutely doable. However, if your bass has sentimental or high-end value, consider consulting a luthier for professional installation.
Conclusion
Swapping out the neck of your Yamaha 4-string bass guitar can breathe new life into your instrument, improve playability, and even change your tone. By following these steps, you can confidently replace your bass neck at home and enjoy the rewarding feeling of customizing your own gear. Have you replaced a bass neck before? Got a Yamaha BB or TRBX story to share? Drop your experience in the comments!
Read Also : How might AI transform healthcare in the next 10 years?